How to configure VPN on a Mac OSX
- Aug
- 01
VPN is a system that allows a user to connect to their organisation’s network from an external location. Essentially, it’s like running a really long network cable from the school back to your house – everything is encrypted making it safe and secure for use.
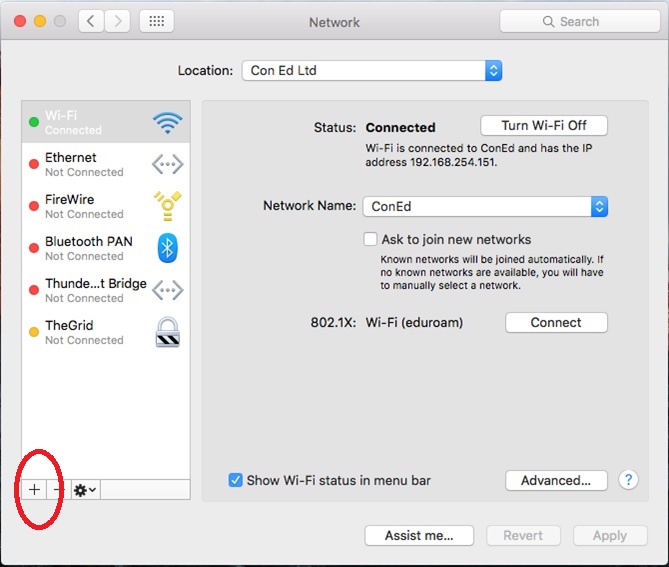
To configure VPN on a Mac OSX, open Network Preferences, click on the + sign (plus sign) in bottom left corner to add a new connection.
In the popup that appears, change the details to:
- Interface: VPN
- VPN Typ:e Cisco IPSEC
- Service Name: School VPN
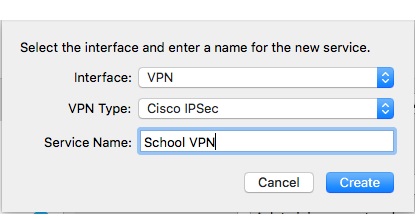
Click Create.
You now need to enter the server address, which is vpn1.hertsgfl.org.uk and the account name, which is your personal VPN username. You will be asked to enter your password each time you connect.
Click on Authentication Settings…
You will need to get in touch with us to confirm the Shared Secret, and Group Name settings – they are both the same values. Once you have this, enter it in the appropriate boxes and click OK.
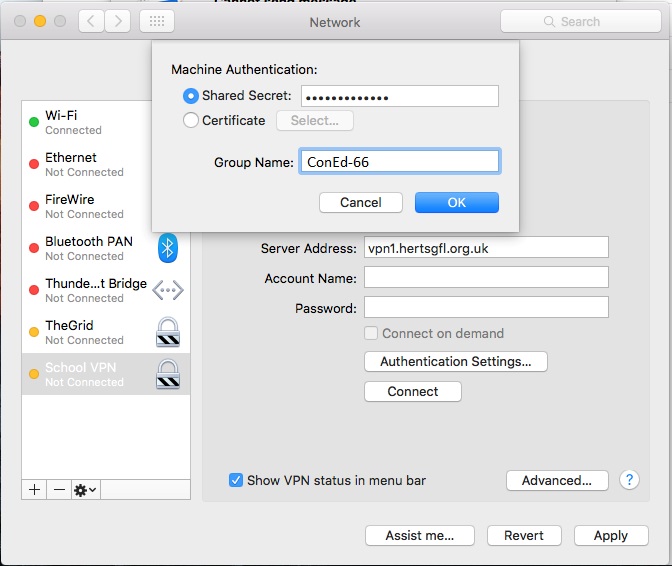
When connected to VPN, it’s as though you are connected to your school network.Therefore you should also define the Proxy settings to be used while connected via VPN. To do this click on the Advanced… button and enter the following for both Web Proxy (HTTP) and Secure Web Proxy (HTTPS).
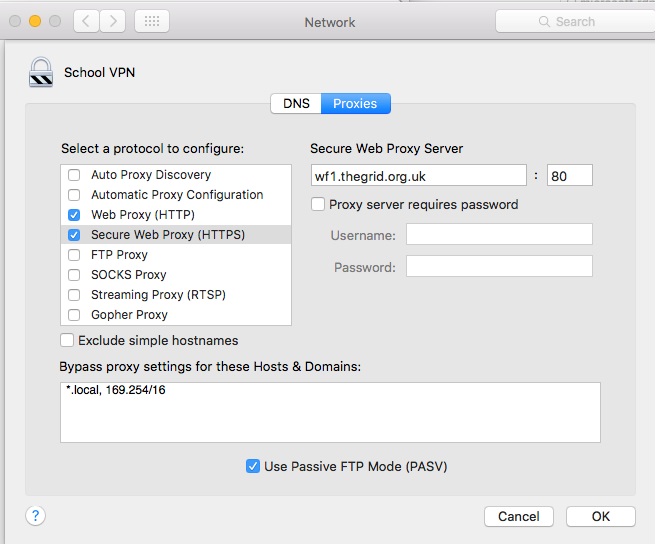
Click OK and make sure you click Apply to save the settings.
That’s the VPN settings defined. If you now click connect, it will prompt you for you VPN credentials. Enter these and you are now successfully connected to the Herts VPN network.
Once connected, the easiest method of working remotely is to use an RDP client. RDP is a Remote Desktop Protocol which allows you to connect to and remotely control a computer as though you were sitting right in front of it. We find the Microsoft one is best. You can install this from the app store. There will be a few oddities, such as the keyboard will be different and won’t have a right mouse button to click, but otherwise it’s a fairly stable platform to work from. Before proceeding, speak to us about setting up a machine at school for you to connect to – we will provide the details needed to set the RDP client as below.
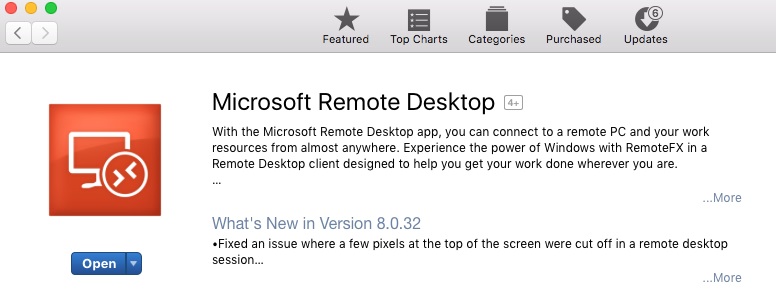
When you first run the Microsoft Remote Desktop client, you will have to define a site. Click on the + sign (plus sign) and enter the following details. You can save the entry by pressing the cmd and W keys. (Or file > close)
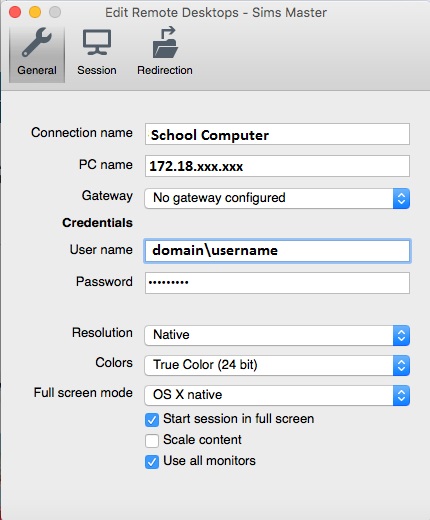
- Connection name: give it a suitable name
- PC name: This is the IP address of the machine you will connect to.
- Username: This is your school computer username
- Password: This is your school computer password
Once the above details are in place, that’s it, now you are ready to remotely control your school machine. Connect to the School VPN network first (from Network Settings), then simply double click on the connection you have create in the RDP client. You will probably get a few security warnings, namely to Verify Certificate. Simply accept all warnings and continue.
If all is well, this should connect and log you into the machine that’s been configured for RDP at school. Remember, that you can only have one person using this at a time. E.g. make sure no one in the school is using the computer when you want to connect and visa versa.
Microsoft Remote Desktop Connection Keyboard Shortcuts
- Two finger click = Windows right click
- Cmd button = Windows “Windows button”
When you are finished with VPN, to end the session either –
- Log Out – Log off windows in the normal way (which logs off the remote machine you controlling)
- Disconnect – Go to the top of the screen and from the Window box, choose Close Connection. (this will lock the remote computer, rather than logging off). The advantage with this method is that because the computer is only locked, if you connect again, you’ll carry on from where you left off.


